All House

The Latest in the Basement: The Living Room, Bar, and Golf Simulator

I’ll let the photos do most of the talking here, but as you can see, more progress has been made (and there is still a lot to do!). I’m LOVING the carpet in our living room area, and while I know it serves a technical purpose, I’m really feeling that black ceiling in the golf simulator area!

Picture turf flooring in that space, and behind it in the bar area, this plank vinyl flooring in “Weathered Wood”.

We are doing a few base cabinets (gray by default, but getting painted our exterior color, Cyberspace)…

(and yes…we will set the trash cabinet right side up) 😉 

…and we’ll be adding a couple appliances to the arrangement to include a dishwasher and fridge. I’m excited to do black stainless down here to further differentiate the look from our kitchen, upstairs. With the light flooring and walls, I like the deep colors that will fill up this space.

We’re still debating a couple options for the counters in here, one which will run on top of the cabinets, and the other, facing into the simulator, at bar height.

A couple more peeks into the finish living room area, that lacks furniture until the traffic of construction is done, (but Crew is loving the space to run, and it has me thinking twice about adding any!).

The final touches will be stone around the column you see framed at the bottom of the stairs, and wrapped around the back of the bar counter facing the simulator. Then, it’s time to decorate 😉

As for our overall timeline, I mentioned we hit a plumbing snag. We had to custom-order (read: cha-ching and also more waiting) a shower pan around which to tile, and I’m happy to report it was delivered today! I’ll be back with an update after bathroom tiling and bar flooring get checked off the list!

All Shopping

My Photography Gear

recommended camera gear | www.29thanddelight.com

I’ve done a LOT of purchasing, experimenting, selling, and swapping my gear out since I really started to get serious about photography a few years ago. A huge piece of getting the right gear is figuring how and what you like to shoot. For me, I photograph families, my own included, and a few interior stills here and there. (I’m also a Canon girl from the start, so I’m sorry, I can’t answer many questions about Nikon or other brands!)

Here’s the rundown of my camera gear:

Canon 6D // My very first “real” camera was a Canon Rebel with kit lens (my model is no longer available, but the equivalent is here) and it’s a wonderful camera with which to begin. If you’re just starting out, this dSLR is plenty powerful as you learn the ins and outs of shooting in manual mode. The 6D, my current body, is a full-frame camera (as opposed to the Rebel which has a cropped sensor), which means the sensor is larger and able to “gather” more information from an image. For example, it performs better in lower light (wonderful for me, as I love to shoot without flash when possible). In my mind, the “ultimate” that I’ve never quite been able to justify is the 5D, whose most noticeable difference is the ability to shoot images onto two SD cards simultaneously. For photographers who shoot “unrepeatable” events (births, weddings, things you can’t recreate later), this dual-slot feature is a must-have, in the awful instance an SD card malfunctions, the images are backed up on a second card. There are of course other bells, whistles, and improvements in performance, but I’ve found for what I shoot, the 6D is the perfect “mother size” bowl of porridge.

Canon 24-70mm // The “workhorse” lens — This is one of my heaviest/largest and not my favorite to grab unless I’m in it for a real session of photo taking. BUT it offers a ton of versatility and is THE lens for that unpredictable toddler age that may run from you OR toward you and you have to prepared for everything in between. It’s the only zoom lens I own now (I was amazed by the 70-200 when I briefly owned it, but I don’t shoot weddings or “real” sports, plus it’s HUGE for hauling around keeping up with families…that said, if you DO have a need for a long distance lens, it’s butter!).

85mm lens // I began with various zoom lenses and quickly learned I’m (mostly) a prime lens girl. Prime lenses have a fixed focal length, meaning you can’t zoom in and out — you use your feet to get closer or farther away from your subject.  It’s a personal preference and prime doesn’t always fit every need, but they are tack sharp lenses and let in more light (always the ultimate goal!). I LOVE my 85mm for portraits — it creates beautiful background blur and a comfortable shooting distance (not TOO in baby’s face, but not so far away I’m yelling directions at people).

(Honorable mention: the uber-popular “nifty fifty” (50mm) is a FANTASTIC, budget-friendly prime lens with which to start. It’s also nice and compact, ideal for travel. Newborn cutie, above, was shot with this lens!)

28mm lens // This is my prime lens for capturing a wide scene (like this family and the cityscape) and it’s ideal for when I need to shoot a group of people in tight spaces. I also think it’s fun for the whimsy of slightly distorted close-ups of children (not as flattering on adults, FYI!). This lens is also great for interior shots, although some prefer to go even wider, I don’t personally care for the shots of interiors that are SO distorted they feel fake and every wall is curved like a fun house. Must-have lens in my book.

200mm lens // I’m using this more and more as Crew gets more into sports and activities where I can’t be close but still want to capture detail. I can capture crisp detail from way down the field in a bleacher, and in part because of the lens length, create nice background blur pretty easily. My first telephoto (long) lens was HEAVY and HUGE. I like that this one is a bit more discreet in a crowd (less embarassing for Crew?! ha!) but still photograph from a reasonable distance.

430 speedlite // Gorgeous light just isn’t always available. I RARELY use flash, but this one has been working for me from the beginning. It’s nice to have just in case a room is less well lit than I hoped when I show up to an in-home session, and the ability to bounce the light in other directions (aka NOT right at your subject — hello, deer in headlights!) allows for more flattering final images. (Budget note: If you don’t think you will use flash all that much, I’ve heard from several photogs that they have been very pleased with cheaper, off-brand alternatives like this one.)

Gary Fong diffuser // I’ve had this on my list for a while and after seeing a photographer bust his out recently at an event I attended, I asked for it for Christmas. I had to know if it was all it was cracked up to be as a complement to my speedlite — and it totally is, as I used it on the above interior shot on a VERY gloomy day. To me — it’s a nonnegotiable now, and I love that the images don’t scream “I used my flash in this one!!”. If you’re going to buy a flash, don’t buy it without this counterpart.

wireless remote // A must if you want to get IN some pictures! You can set the timer all you want, but sometimes it’s nice to just know exactly when that camera is clicking. You can easily hold this discreetly in your hand while cuddling up to your favorites and snap away. (Tip: posing yourself without showing the remote takes a little practice — but it’s small, and in the above shot, it’s hidden in my left hand.)

Other Notes:

Camera bag — I don’t have one! I’m that risk-taker who throws a spare lens into the pocket of my vest and goes — for now. (I HAVE tried and discarded a couple options so far. If you have suggestions, please send them my way!)

Editing — I shoot in RAW and edit in Photoshop ACR (although Lightroom is another great option). I love Mastin presets as a starter point to play around with some editing “recipes”.

Online storage / Business website — For my rather simple needs (ClickSmith has always been a part-time gig for me), Zenfolio has been my vendor of choice. They have MANY levels of pricing and features to go with.

Photography Classes — Online, I loved the 101 and 102 courses at Shoot FLY Shoot when I was first getting started. If you’re in the Des Moines area, I HIGHLY recommend ALL of the classes at Christian Photo in Urbandale.

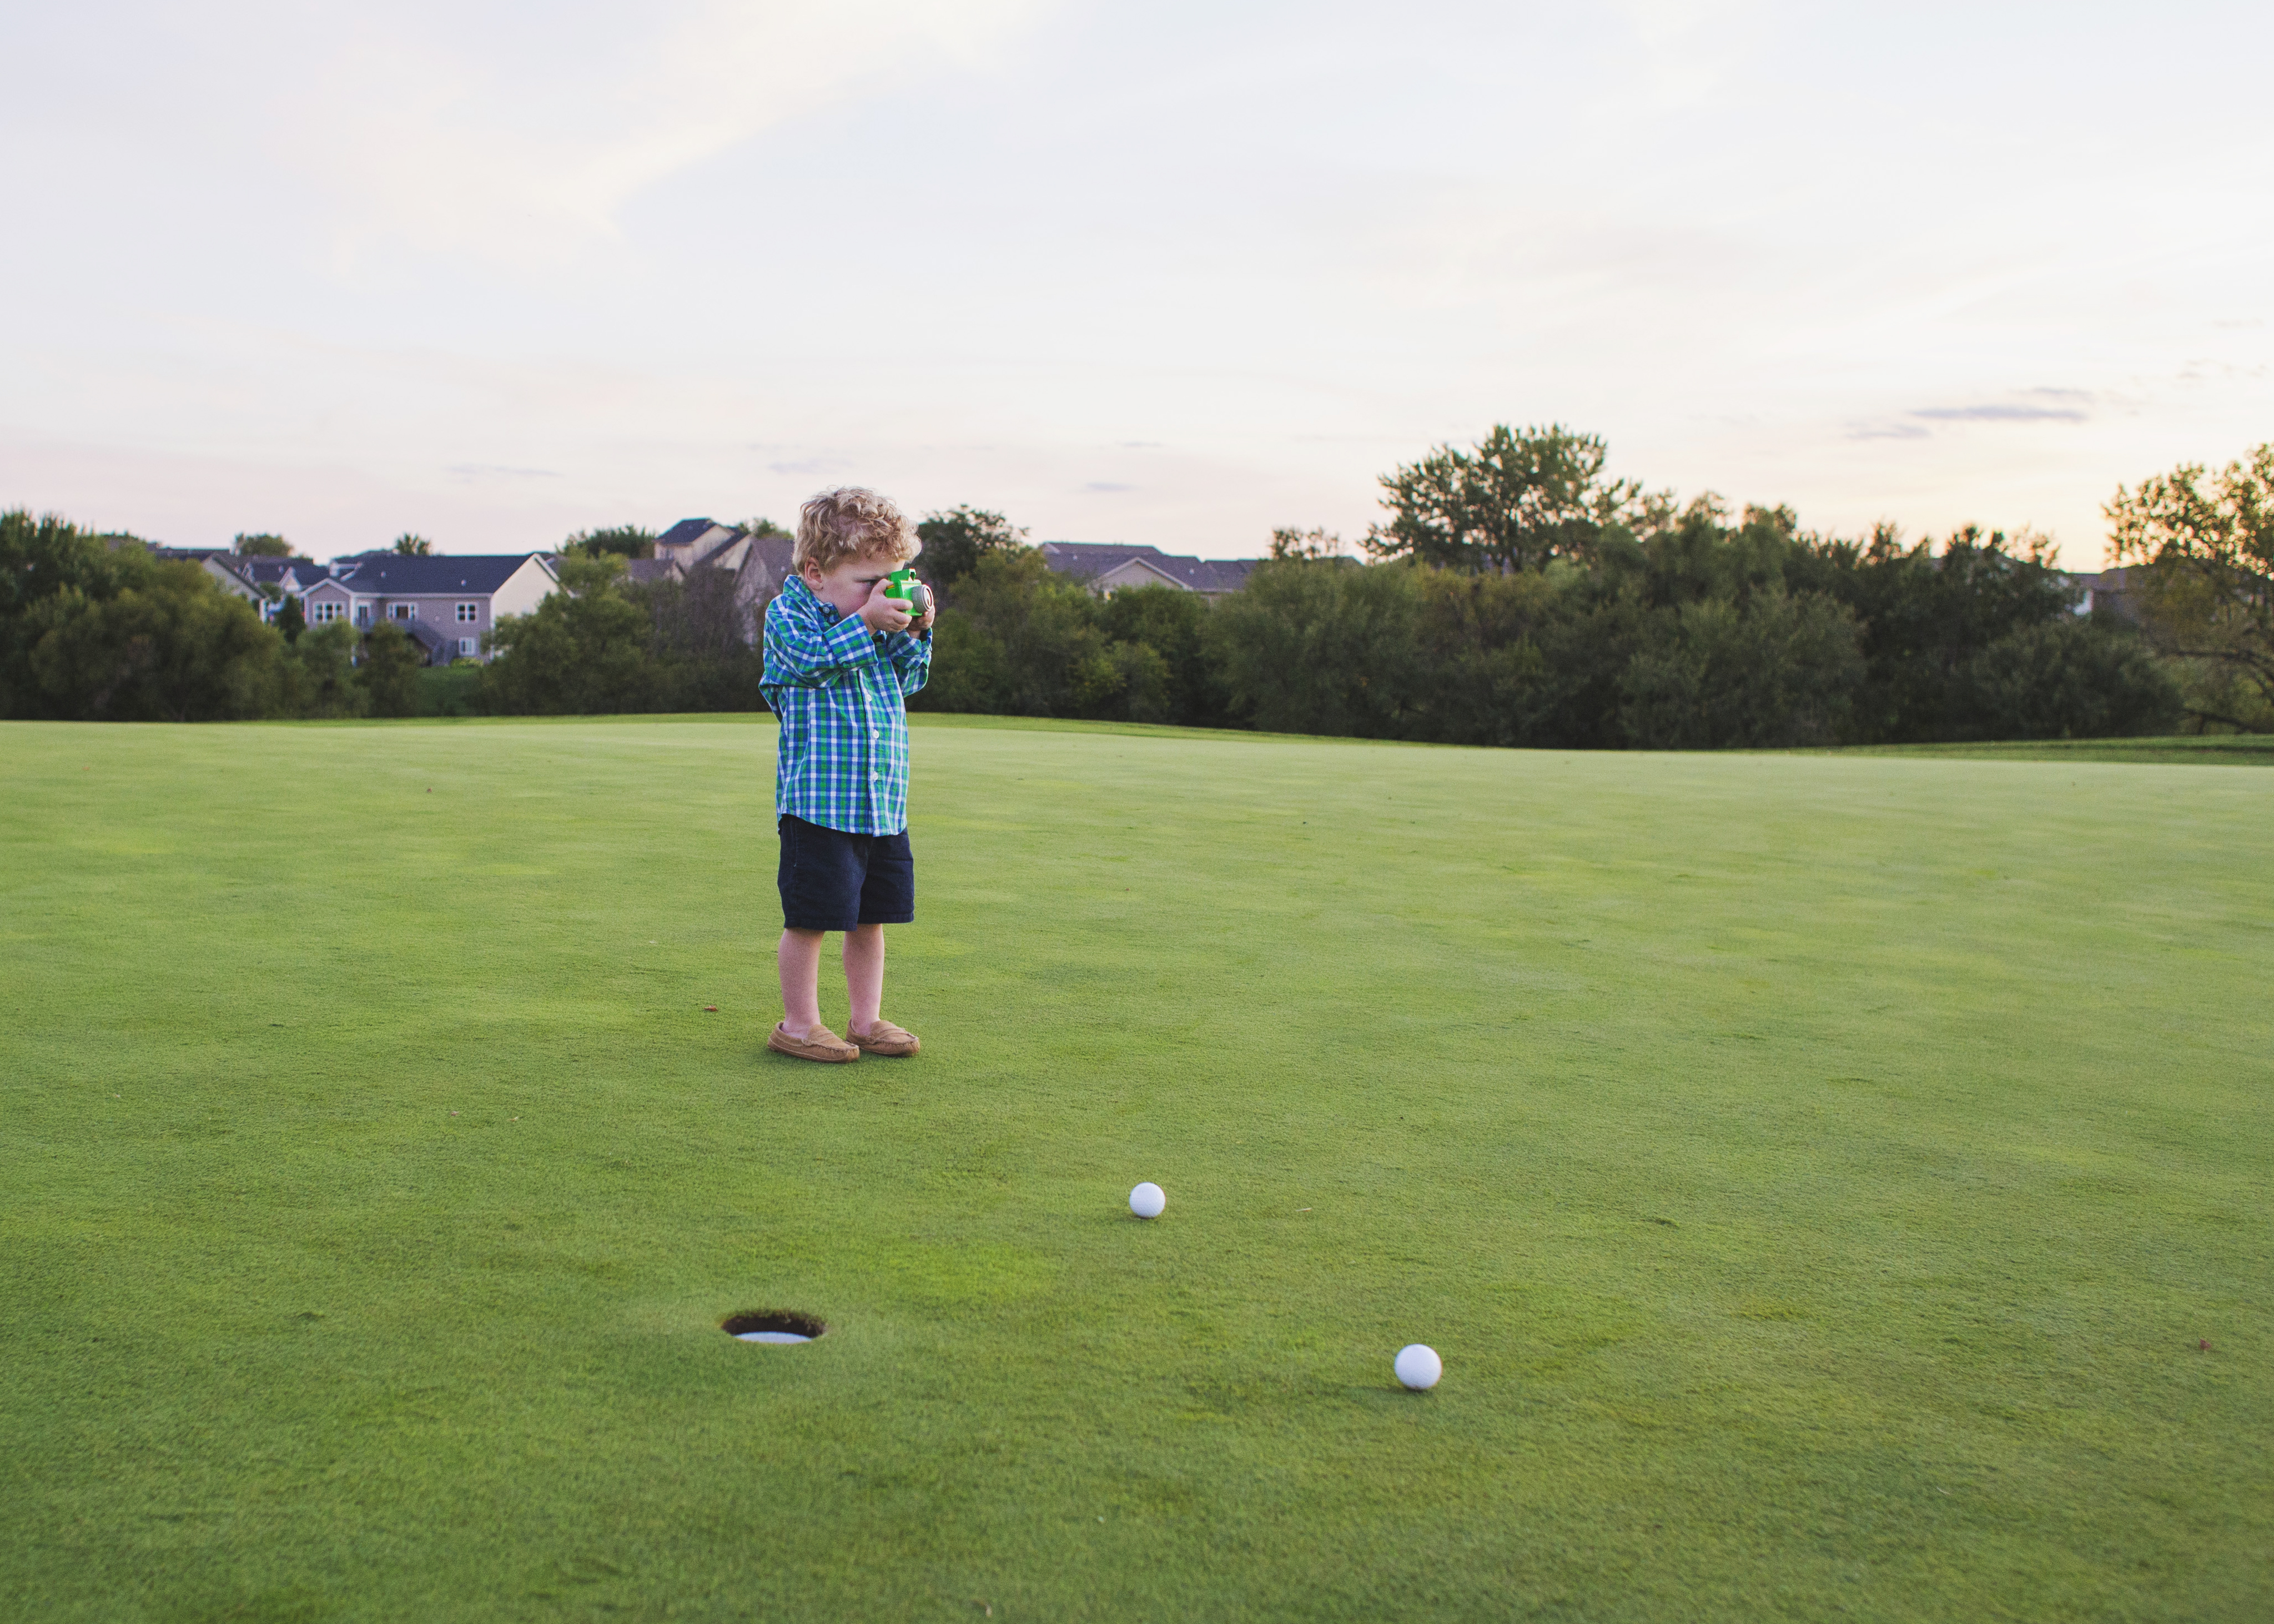
Photography with KIDS — Crew does not yet have his own camera (the one pictured at the top came in a happy meal!) — but I’m looking seriously at this one to get him started! We DO walk around and have “photo lessons” about subjects and composition with the real time feedback of this fun Instax. We’ve had it for several years and still love it!

***If you’re looking for tips and tricks on photographing kids on ANY kind of camera — I wrote a little roundup of thoughts here!

All Shopping

A 3-Year-Old’s Reading List

I’m so thrilled that Crew LOVES a good reading session, and is starting to “read” books back to us as well. I think this age is particularly fun for books, because the stories become more elaborate, and the illustrations more like works of art. Characters, plot, morals of the story all begin to exist. Questions are explained. Concepts are broken down. Real discussions start to evolve after the close of the cover.

You can actually see those little wheels turning and growing.

While there are what seem like zillions of titles in rotation right now (and several borrowed regulars from the library as well!), I’m doing a run-down today of some serious favorites. As I compiled this list, I realized we’ve only picked out about half of these — the others have been gifts from family and friends. We lucky to have a bunch of book lovers in our “village”!

Dragons Love Tacos — (and the sequel, Dragons Love Tacos 2) I’ve actually had to hide these books from time to time. They’re adorable, but Page and I both hit a point where we just. couldn’t. read. them. anymore. Dragons and dinosaurs go hand in hand for Crew I think, and the idea that they breathe fire is highly interesting to him. Read with a little extra drama for fun points. 😉

My First Mazes — Not a story, but a worthwhile mention. All about the mazes, I’ve been a big fan of this one and this one, both of which progressively get harder as the child works through the pages. Similarly, this one gifted by our neighbor follows the same process, but I like that it offers a little more context as far as what happens when the maze is complete (i.e. get the car to the garage) and then asks a follow-up question. Yes, there are some apps that offer mazes, but Crew seems to prefer the pen and paper and I think there’s value in working on both pen control and having that tactile experience. We can’t buy these fast enough before he’s through them!

First Math — I’m a self-proclaimed math nerd and Crew is right at that point where he can identify numbers and count objects but is ready for a little more. This super visual, lift-a-flap approach helps him work through when you have 2 of something and 3 of something else…and then reveal the answer. I tend to prefer the more “workbook” type content from Usborne as opposed to the stories. At the suggestion of a rep, I also brought home Take Away which has a slide and find approach to subtraction. It’s a little beyond him at the moment, but will be great in a few more months!

After the Fall — I could not love the concept behind this book more. This is the story of what happened after Humpty Dumpty got back up again. And the author is a Caldecott winner. Enough said, right?

How Do Dinosaurs Say Goodnight — Crew is very into dinosaurs, so when my mom found this book for Christmas, I knew it would be a hit. There is a whole series of “How Do Dinosaurs Say…” and each version there is a glossary of the types of dinosaurs in the front/back cover, so you can identify them as you go through the pages.

Cook In A Book series — we currently have Pizza and Pancakes (and Tacos is arriving for Valentines Day). Crew LOVES to cook, real or make believe, and is super interested in units of measurement (“how many do I go to, Mom?”) so something that can walk him through the same recipe time and again is right up his alley. I think these are such cleverly designed books — spinning a wheels lets the sauce suddenly “appear” spooned onto the crust, tabs allow kids to “pour” ingredients into a bowl, you set the dial on the oven, you flip the pancake onto a plate, etc.

A Loud Winter’s Nap — Fun to have books about winter, but not specifically holiday. This was gifted to Crew for his birthday and my favorite part is the gorgeous illustrations. The lesson is about a change in perspective (“tortoises don’t like winter!”) and it hits on lots of things that are big in our world this season — snowball fights, sledding, etc.

I Stink — we actually bought the board book of this story when Crew first discovered his love for garbage trucks (around 18 months) and if I’m being honest, the ridiculous language drove me a little crazy. So many adjectives and sound effects. It’s a mouthful to read aloud. And yet, when we received it again in full format at his birthday this year, and have since rented the companion DVD from the library, I see just HOW into the overdone verbiage Crew is, and I’ve come full circle. Also, the full version references a few times “crew” as in the garbagemen, and someone is downright DELIGHTED thinking it’s written just for him.

All of the Elephant & Piggie books — we own some and borrow others from the library — this duo is a big hit in our house. I purchased the first couple to prep Crew (and okay, Page, too) after I bought tickets to see “We Are In A Play!” at our local childrens theatre. I love that the books navigate lessons that are tricky (waiting is hard, sharing, etc) and the simple illustrations and emphasis on words/character dialogue is a great primer to focusing on the language to follow along with the story as opposed to spelling it out in elaborate pictures.

Goodnight, Goodnight, Construction Site — we’ve had this one for a year now, but it’s still a regular favorite. Aside from the fact he loves to name all the construction vehicles, the rhythmic writing is kind of lulling and by the end of the book, it really does have a wind-down effect for bedtime.

Machines At Work — I remember my own brothers being obsessed with this title. We are almost beyond it in terms of the simple writing, but Crew is still in love with identifying the machines, and prefers to be the one who “reads” (recites) it back to us.

My Very Own Name — Some family friends gifted this personalized book that incorporates a rhyming story with a letter-by-letter building of his first and last name. Crew loved from the start hearing himself referred to in the story, and identifying the animals throughout, which are cataloged in the back for reference. As he’s gotten better about identifying letters and spelling beyond his first name, he is SO. PROUD. to correctly predict each next letter. Awesome gift idea!

Ragweed’s Farm Dog Handbook — my aunt’s background as a librarian means ANYthing she recommends is sure to be a success. She gifted this title to us and it’s one of my favorites to read because of the humor. It also doesn’t feel like any other style of childrens story I’ve read in terms of the “handbook” approach to a topic.

I ALWAYS love hearing others’ must-read lists, so hit me up with them 🙂 Happy reading!

You can read my list of toddler book recommendations here.

*post contains affiliate links*

All House

Basement Progress: The Gym

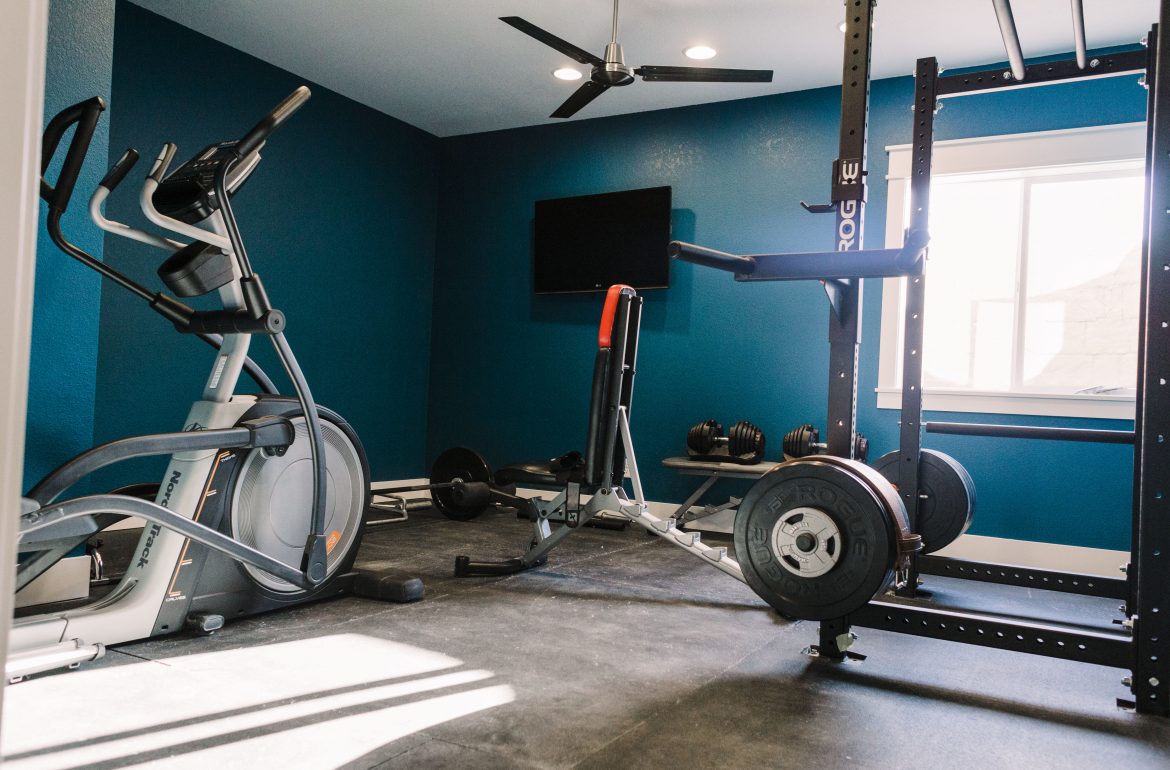
The fan is up, the lights are on, there are handles on the doors and the TV is hung! The gym has come a long way since I last shared about its progress.

We are only waiting on a series of wall mirrors and thanks to my birthday gift (thanks, Mom and Dad!) the ballet barre is ready and waiting to be installed in this far corner. Can you say, “no excuses”?!

More to come, soon!

All House

Our Oversized Modern Floor Mirror

Excuse any gushing that follows (mirror or man related!) but I had no idea how handy the guy I married ten years ago would turn out to be — and more recently, he’s evolved from handy to downright artist.

I mentioned to Page before the holidays that while we were making a few little decor updates in our master, I would love to get rid of the awkward jewelry armoire that stood right inside our bedroom door, and swap it for something more low-profile in the floor space — specifically, a giant floor length mirror.

I had pinned a few inspiration mirrors (West Elm and others), but nothing was quite right. I knew I wanted the clean modern lines, but not too minimal — I still wanted some “chunkiness” and it needed to be large in scale with our high ceilings and not be totally dwarfed by the extra-tall wardrobes on the opposite wall.

This guy can read me like a book. He took my inspo pins, and concocted a design all his own. He even chose the wood — maple — to tie in some of the lighter tones I’ve been using in this room in the form of baskets and jute bins.

I didn’t know or see ANYTHING until it was 95% done!

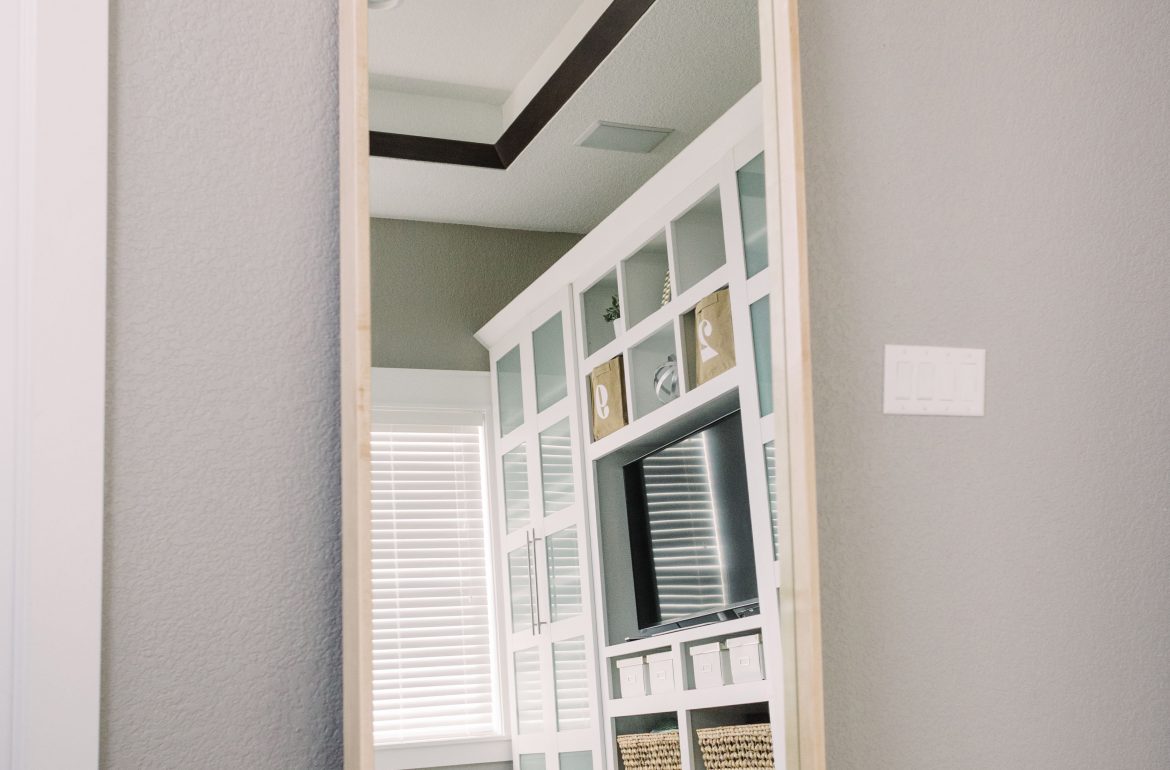
I’m in love with the legs on this mirror and I would have never come up with these on my own. I wouldn’t have necessarily thought to add legs, period, and I certainly wouldn’t have thought outside the box to angle them the way he did. They remind me a bit of an art easel, and I love that they’re the only white element, tying it all back into our trim and doors and wardrobes.

(For the handy ones interested, they are 2.25” square legs made from three pieces of wood laminated together. He routed them with a roundover bit to then cut them at 15 degree angles at both ends.)

Because you truly do see the mirror from the side first walking into our room, I love the chunky profile he gave to it. The glass sits halfway back in the frame, so from the front it doesn’t feel as deep, making the side that much more “wow” factor.

Even with its simple lines, the details are still there. To fit the mirror inside, Page routed a groove inside each side, then added the little square filler notch in a contrasting piece of oak to plug the routed grooves so they wouldn’t show from the outside.

Love. Love. Love. Happy birthday to me! (And yes, the builder and his faithful project manager both “signed” it for me!)

All House

Basement Progress: Guest Bedroom and Bath

Following up on last week’s post on our “kid corner” — the understairs play space and our toy closet — I’m sharing more progress today in our basement, as we make our way to the final stages of our basement finish. Today I’m sharing the guest room (well on its way to completed) and our bathroom (nowhere near…but happening very soon!).

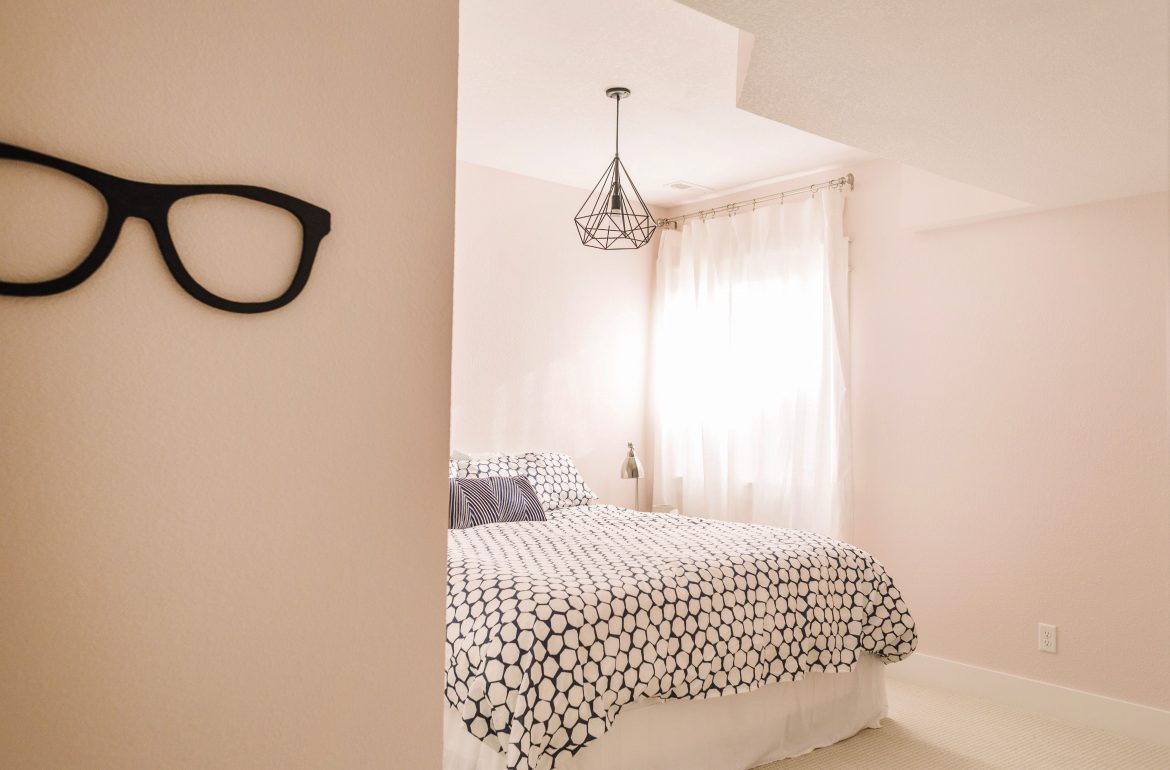
Since I last shared any photos of this room, we’ve checked a few items off the list, both big and small — it’s validating sometimes to see just how much it takes to bring a space to fruition (and a good reminder to me to be patient with the progress). Walls have been painted, carpet installed, curtains and light fixtures installed, closet system installed, door handles on all the doors, vent covers reattached to the vents, and we moved in a bed and a couple little decor items. I still love this paint color (although damn if that blush color isn’t suddenly EVERYwhere!). I’m on the hunt for an upcycled mid-century dresser to put opposite the bed, both for storage and to hold a television. I feel like I need that in place first before deciding on whether or not to add a chair or bench in here, and the walls are mostly still bare, but this room is officially functional!

In sharp contrast, I give you the bathroom, right next door! We’ve hit a plumbing snag in here that may change the approach we take to this shower, but either way, the lighting is installed and the tile has been purchased and is stacked just outside the shot you see here, waiting for our contractor to work his magic, hopefully starting yet this week. If I had to narrow it to one guiding inspiration room, it’s this one:

source

You can see more of our inspiration for this bathroom in this post, and since then, we’ve more or less stuck to the plan. We went with a black slate floor tile, white subway tile in the shower, and contrasting grout for both. The light fixtures are in, and we’re in the process of picking out black plumbing hardware. Page plans to make our vanity similar to how we approached the bathroom in our last basement in our first home.

That’s where we are today in these two spaces, hoping to share more on them very soon. In the meantime, I’m working my way through the rest of the basement, with more basement updates to come. Happy Monday!

All Crafty

Classroom Valentines: Heart Crayons and 3-D Suckers

I have to say, I’ve loved every stage, but three is proving to be particularly fun with all of its enthusiasm. When I started to explain Valentine’s Day to Crew, and that we were going to make valentines to give his friends, he was ON. BOARD. to say the least.

I started with something he could truly make — you’ve seen these all over Pinterest — heart-shaped crayons. I will say, grouping these into like colors is key…they look like a hot mess if you just mix random hues. Also — tip: Soak the crayons in warm water to make the paper wrappers easier to remove. Once bare, break them into pieces and bake for 15 minutes at 250, popping them out once they’ve cooled. We used this silicone mold and it was the perfect size and super easy to remove the hearts.

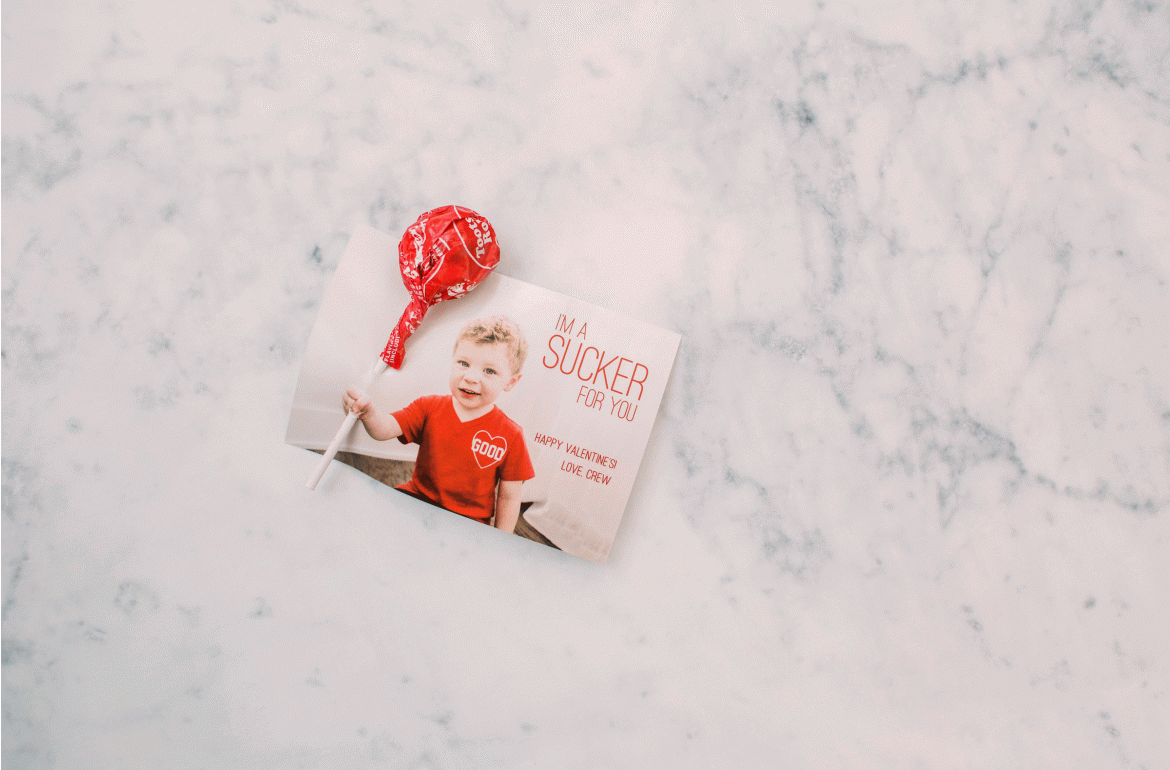
I thought about making the crayons part of his cards, but instead we focused on the holy grail — suckers. Another idea I can’t take credit for, as it already exists around cyberspace: 3D sucker cards. I put Crew in his VDay shirt and among MANY outtakes, (so much “cheeeeese” and eyes closed lately — coupled with holding his arm the right way!) we finally got a shot we could use.

If you attempt this, definitely ask your kiddo to hold his/her arm out in FRONT of them (so the hand is as large as possible to give you space to poke the sucker through) and also out to the SIDE (so the sucker doesn’t end up in front of their face). Don’t shoot too close, allowing plenty of room on the sides to hold both the weight of the sucker and any message you want to add. I laid my text out in photoshop, sampling the red font color from his shirt. I can’t say enough good things about printing with Mpix — I send all my photo clients there! — and when wallets didn’t seem quite big enough to support the suckers, but 4×6 seemed like overkill, I went with 3.5 x 5 prints.

You might say we’re suckers for a good holiday project. 😉


All House

Under Stairs Playspace and Ikea Algot Toy Closet

We haven’t done much in the basement in recent months (other projects taking priority!), but I’m still behind on updating what we’ve accomplished so far. This time last year we gathering estimates for tape and texture on our drywall, so we’ve come a long way! Today I’m sharing the area just to the right when you come down the stairs — the under stairs playspace and toy closet!

You can see we still need to mount the little house number “5” (Crew’s lucky number!) and trim out the faux wood so that it seamlessly connects with the wall and gives the illusion of a roofline. Crew’s favorite part of this spot is by far the ability to reach the light switch inside and turn on his “porch light”.

(By far, the tiniest room I’ve every attempted to photograph!) This space will change many times I’m sure, but for now it’s a little reading nook with his Pottery Barn chair and a couple shelves to hold favorite books. We kept it clean and simple in here with white walls, and I applied navy decal stars to give the feel of wallpaper on the far wall.

(The view looking up from that little red chair — we continued the star theme with some string lights he can plug in for a little extra magic in this space. The “Be You” sign was originally gold and I spray painted it navy to make it feel a bit more masculine.)

And the view looking back toward his little door. We did a flush mount light to minimize head bonking, and I love that the “Be You” sign is hidden until you’re all the way in here. Some stained wood arrows pointing into the space, and matching book shelving complete this little spot I’m totally giddy about.

I Want My Hat Back / Ferdinand / Love Matters Most / Not A Box / Be Kind banner

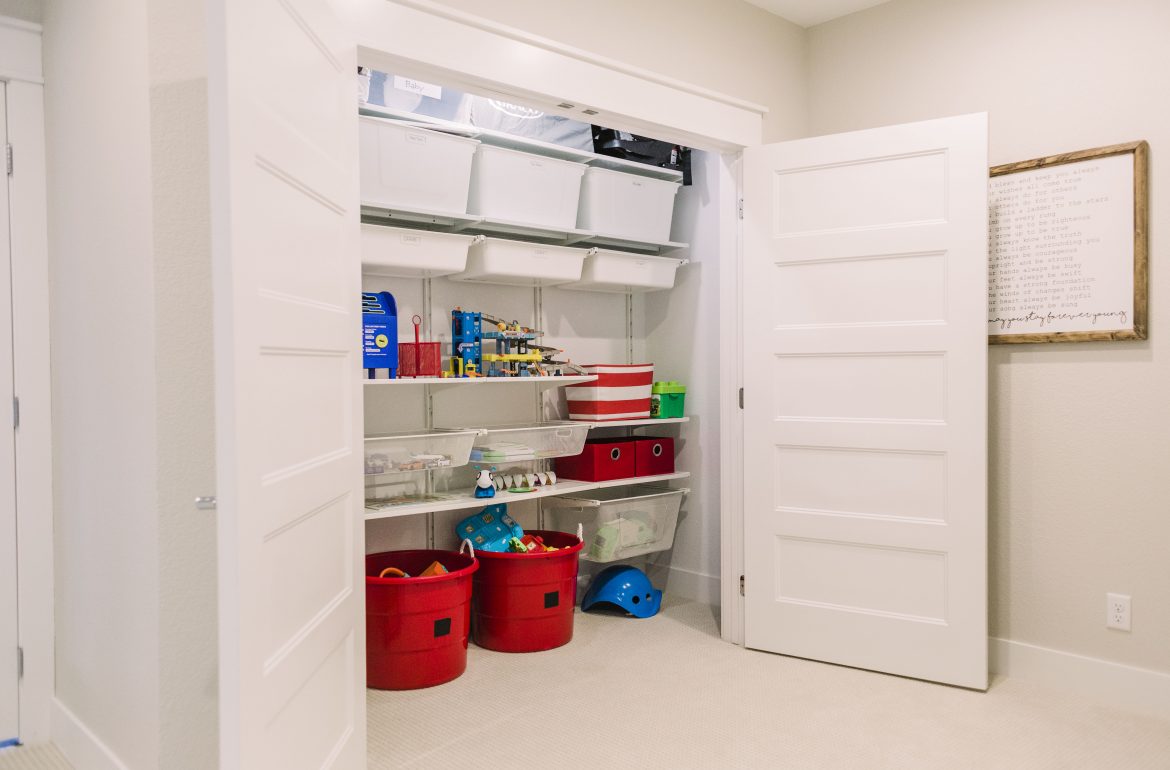
Back across from the playspace entrance is the double doored toy closet. (And for those who’ve asked, the framed print is from Smallwoods — the lyrics to “Forever Young” seemed so appropriate here!)

This closet has always been at the top of the list for the basement plan, as we saw one similar in a builder’s house we toured before building our own home.

It doubles as current toy storage on the bottom half, within easy reach for Crew…

…and outgrown toy/baby gear storage up high. It’s so nice to still be able to find our bins of infant/toddler toys when babies come to visit us, and until we know if there’s another kiddo in our future or not, this stuff is tucked neatly away.

We also have a couple of bins for things he either hasn’t quite grown INTO along with a couple Christmas and birthday gifts we were able to hide away in all the celebrations, for a rainy day when all the newness has worn off and he’s ready to play with something different.

I’ve used some Elfa products from The Container Store, but decided for this closet to try Ikea’s Algot system. Overall, we’ve been really happy with it. There are plenty of options and ways to configure what you’re after, although Page might write a bit different review about actually mounting the support pieces on which we built this all. I HAVE found that with the lidded tubs (up high) you have to line them up JUST right to get them on and off the rails — which would be frustrating for a small child trying to access bins of sorted toys, so I’m glad we kept it easy with freestanding tubs on the floor and open mesh basket drawers (that don’t come all the way off, but rather function like a normal drawer).

It is SO nice to have a spot for everything, and be able to shut the doors on it all!

striped bins / red tubs / red grommet bins

Cheers to a new year, organization, and a new indoor spot to play on days like today when it’s 2 degrees out!