Category / Crafty

All Crafty

Patriotic Poundcake (Kid Chef Friendly!)

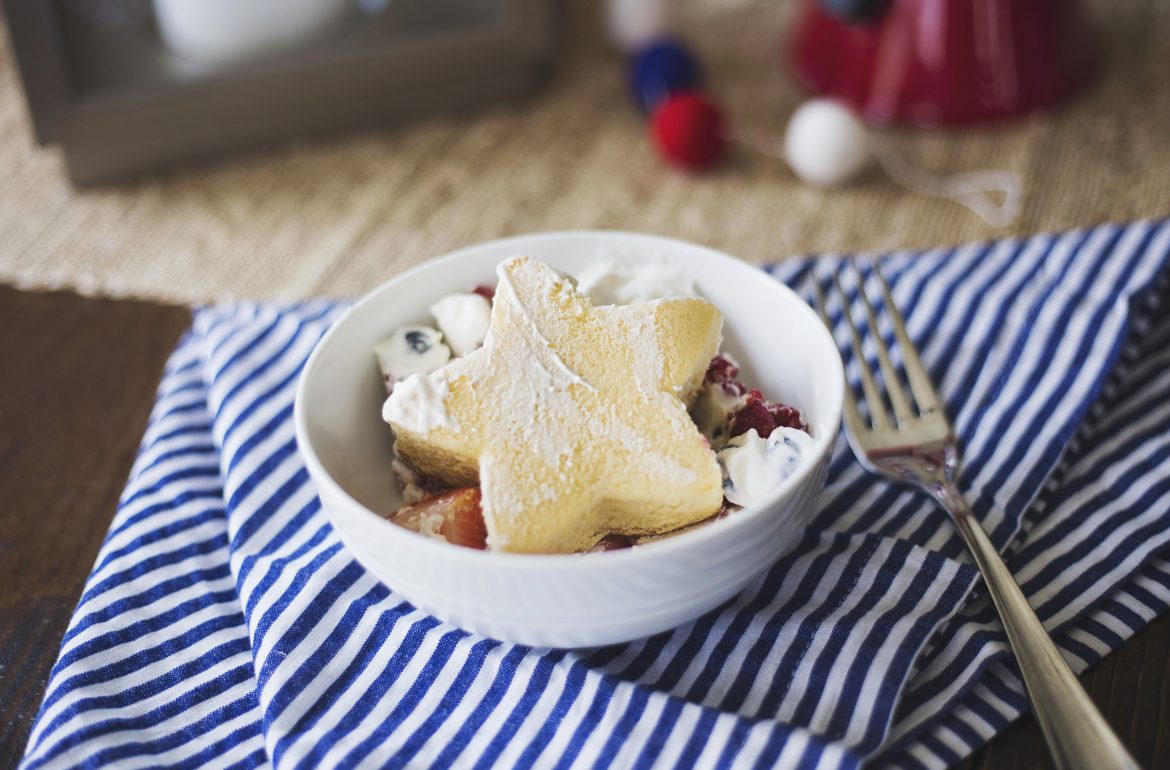
I’m no cook, but I do love a pretty dish – especially when it’s dessert. Whether it’s Memorial Day, the 4th of July, or just any old summer day, you must try this simple treat. I love it as a way to include kiddos in the kitchen — they can wash and chop fruit, scoop Cool Whip, and of course cut stars out of the poundcake!

You don’t even need directions or an ingredients list — just slice up a frozen Sara Lee poundcake (and cut into stars!), add sliced red and blue berries (I used strawberries, raspberries, blackberries, and blueberries), and add a tub of Cool Whip. Light and refreshing and oh-so-patriotic-summer!

All Crafty

Sugar Cookie Decorating Tips & Supplies

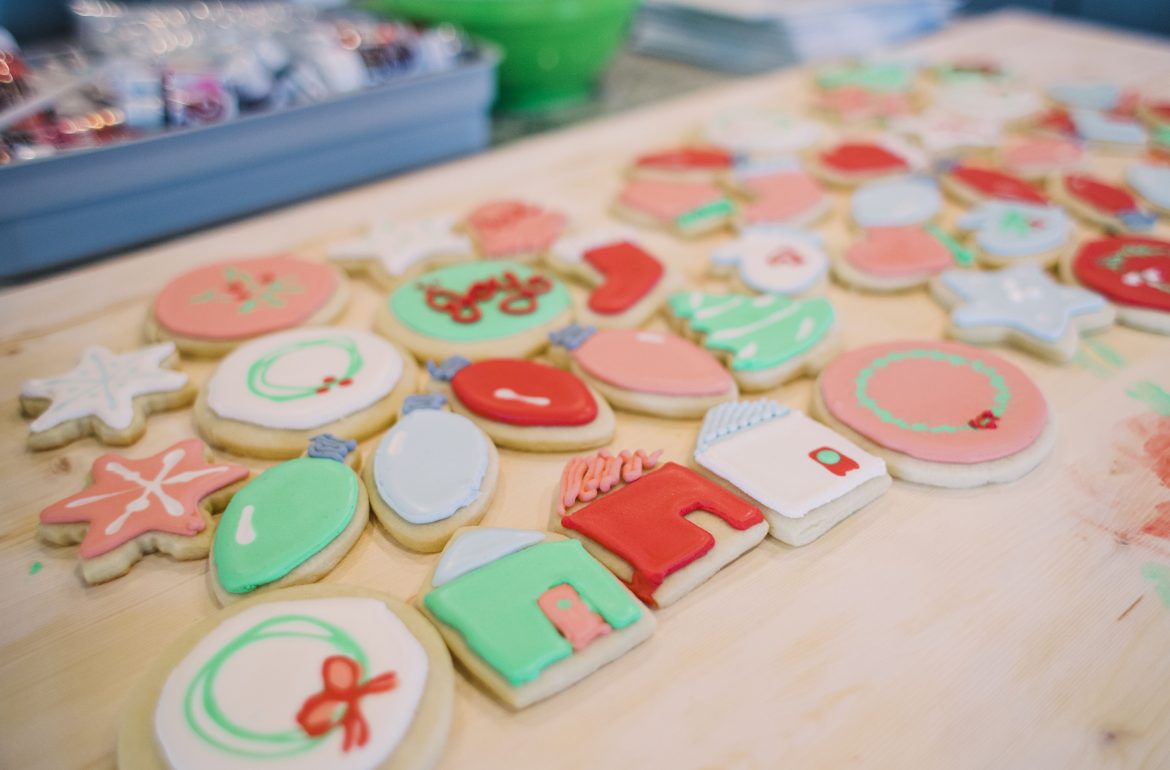
In recent years, I’ve gotten pretty into the decorated cookie craze. I love any artsy project, but these happen to work year-round for a sweet treat and they are wonderful to gift. It’s a relatively inexpensive hobby and the cost is your time, not so much money — I’d guess I have MAYBE a hundred bucks in ALL my supplies I’ve collected over the past several years. (Okay, that’s assuming you already have basic baking stuff on hand like a mixer and cookie sheets.)

Today, I wanted to share my favorite tips and tools for decorating (full disclosure: I’m not a professional baker, I just do this for fun!) as well as my favorite icing and dough recipe (after many, MANY rounds of trial and error!).

BAKING THE COOKIES

Let’s start with the cookie. I love THIS recipe for my sugar cookies – the shape you cut out won’t bloat or expand much, what you see is what you’ll get! I follow it exactly, and to her point, I’ve frozen the dough before when I make extra batches, but do let it come ALL the way to room temp before you start working with it. By far, it works best to whip it up and use it right then without storing/cooling time.

I keep a stash of cutters in our pantry (they double as sandwich cutters for Crew’s lunches, too). I have holiday-specific ones, but a favorite year-round set has been this alphabet set as Crew wants to spell his name or it’s fun to gift someone a little set of cookies that spell out “JOY” or “LOVE” or “BOO” depending on the time of the year.

You can roll your dough out on your floured counter, (I use a regular wooden rolling pin, nothing fancy) but Page specifically cut a giant piece of pine to perfectly fit one half of our island and sanded it super smooth. We originally wanted it for rolling out pasta dough, but it doubles as my cookie surface now. At the recommendation of the chef we learned to make pasta from, we picked up a large drywall trowel that we only use in the kitchen to scrape off caked-on dough and extra flour when we’re done (genius). My exact cookie sheets are no longer available but these are identical (the textured surface makes it nearly impossible to end up with stuck-on cookies) and to keep them nice, I only use them for baked goods (we have separate baking sheets for pizza, snacks, and anything else). Of course, use ALL the flour when cutting out your cookies – I dip my cutters in it, and keep it liberally sprinkled everywhere, rubbing it onto the surface, the dough, and the rolling pin every so often.

MAKING AND COLORING THE ICING

I won’t lie — baking the cookies is the easy part, but I also thinks it’s the less fun. Now you get to be creative! I first learned some basic techniques in a local bakery cookie class. I went home and practiced, and have evolved how I do the next part, so I’ll share both ways below. First, you need some royal icing. Again, after MANY different tested recipes, I like THIS recipe because it dries firm enough to stack your cookies, but not rock hard like so many versions (you want them to look AND taste good!). They have the slightest shine to them when they dry, and there’s no egg white like some, so you don’t have to worry about them sitting out.

After you’ve whipped up your batch of frosting, divide it into bowls, depending on how many colors you want to use. (I use Pinterest all the time to get inspo on color palette, and I pick out a handful of cutters I know I want to use, and determine my colors accordingly.) Your icing, well covered, has a shelf life of about a month, so I’ve gotten in the habit of mixing each color directly in a food storage container with a lid, so I can keep any leftovers if I want to. I’ve tried a few kinds of food coloring and have come to love these the best. Tip: you will need WAY more red and black compared to the others to get a true red or black, so I buy the bigger bottles of those colors. It was a game-changer to learn that to get an even wider color palette, you can add ivory food coloring to your pure-white icing to get a whole bunch of softer colors.

Piping and Flooding

This is how I originally learned to frost and it’s how I frosted the IOWA cookies, above. For this technique you’ll need icing bags and a basic icing tip and couplers for each bag/color you plan to use (this video can explain how to to put your tip on your icing bag better than I can explain in writing.) You can play around with different tips, but I always go back to the no.3 as my sweet spot. You’ll also need a few squeeze bottles (I’ve used and like both this style and these).

For each color of icing you’ve made, you’re going to divide it in half. Spatula half of it as-is (thick) into an icing bag and tie it off with a rubber band or I do like these to hold them closed. With the remaining half of each color, add a few drops of water and remix, SLOWLY adding more water until the icing is the consistency of runny glue. Once you have that, pour it into a squeeze bottle. NOTE: I once did this out of order and split up my icing BEFORE I’d colored it — you want to color it first so it’s consistent and matches perfectly. Huge headache to try and do this after you’ve split it up!

Start with your piping icing (in the bag) and outline your cookie or the portion of the cookie you want in that color. It should be nice and stiff and hold its outline shape. Take your matching flooding (squeeze bottle) icing and outline JUST inside your piped icing, getting as cloooose as possible even overlapping a tiny bit without going outside your line. Once you’ve done a full outline, just squeeze all over “flooding” and filling in your outline. It feels extra, but this tool is INVALUABLE in popping any air bubbles you might get while flooding before they dry.

All-At-Once

I did the piping and flooding method for a long time and still sometimes do if I need super precise detail. But in the batch above, as a time and clean-up saver, I’ve also tried for ONE icing color consistency just a tad thicker than the glue and as my hands have gotten steadier, I just pipe the thick-flooding as my outline and fill right in from there. This definitely takes practice and if it’s even the slightest bit too watery, it’s a hot mess (and no I hadn’t yet popped air bubbles in the shot above ha!). But I mention this option for anyone wanting to try!

To finish it off, I love some sprinkles or simply dragging toothpicks through the icing to make pretty designs. There are zillions of YouTube videos on simple decorating techniques once you’ve got the basic icing down. A favorite sprinkle look (seen in the footballs above) is a clear piping gel design, then sprinkle a sugar on top and shake off the excess.

Happy decorating and of COURSE be sure to taste test throughout the process! 😉

All Crafty Family

Dragons Love Tacos Halloween Costume

I spent weeks taking this 3.5 year old to the store, browsing online, and generally asking him what he might want to be for Halloween. Anything I suggested was met with some variation of “meh” — until I proposed a character from one of his favorite books. If you have a kid in your life and haven’t read Dragons Love Tacos, do so immediately!

The ONLY opinion that was voiced was that he wanted to be a BLUE dragon with green wings. So off to Primary I went for their hoodie and joggers to get started.

If you are familiar with this book, you know the whole story unravels when the dragons get ahold of the spicy salsa. I grabbed an orange pumpkin bucket from the dollar store, spray painted it red, and we loosely followed the illustration as a guide, using scrapbook sticker letters for the label.

Dragons Love Tacos Halloween Costume | 29thanddelight.com

I bought a yard of the most dragon-ish green fabric I could find for the wings, tail, and horns. I am NOT a seamstress, but I managed to make a simple cone shaped tail, turned it right side out and stuffed it with stuffing. I added a single triangle “horn” to the end of the tail, and tacked the other two onto the hoodie. I bought a pair of children’s fairy wings at the dollar store to use as my base, covered them in the green fabric, changing the outline of the wings to be a bit more dragon and less butterfly. I sewed the top of the tail to the underside of the wings so he could put the whole thing on as if it were a backpack.

To drive home that this wasn’t just any dragon but a taco-loving dragon, I bought an “I Love Tacos’ button on Etsy and pinned it to his hoodie. We made a couple cardstock and tissue paper tacos and stuffed them in each pocket — after all, you have to have “pantloads” of tacos to host a proper taco party for dragons.

Oh no, dragon! You know what happens if you eat that spicy salsa!

Happy halloween — and happy costume creating — from our home to yours! <3

All Crafty

Classroom Halloween Treats: Witch’s Brew Bath Bombs

We’ve been busy over here whipping up all the magic potions so that Crew’s classroom friends can create some of their own for Halloween!

You may have guessed it — we made our own bath bombs, complete with spooky surprises inside!

This project was much easier than I expected (I was fully counting on some crumbling bombs and preschooler – and Mom – meltdowns) but I’m happy to report it was really pretty simple and straightforward!

It DOES help to have all your stuff ready, premeasured/open, so you can work quickly. (Once everything is mixed, you want to make your bombs before the mix gets too dry.) I did two batches; the first I followed the recipe below exactly (this made about five medium-sized bombs), and when those turned out well, I quadrupled it to make enough for Crew’s class of 24 and a couple extra friends.

My best tip is to spend a minute on YouTube watching an actual video of how to make these, because I picked up a lot of hints and it helped me understand better than all the written directions out there. In all I’d say we spent about $20 on everything (although I did already have the essential oils on hand). And if you keep scrolling I’m sharing a printable of the label we stapled across the top, so you can gift these as well!

After reading a few reviews of silicone versus plastic versus aluminum, I settled on this set of molds. I don’t foresee using the small one much, but the medium was perfect for stretching the batch enough to make decent-sized bombs for 24+ kiddos (and I’ll be making my own and gifting some at the holidays with the larger mold, which feels even more grand/luxurious). They worked like a charm with no sticking.

For our bath bombs, we knew we wanted them to be green (but not so pigmented they stain anyone’s tub ha!) so we used green food coloring accordingly.

THE RECIPE:

1 cup baking soda

1/2 cup citric acid (cheaper online than in stores)

1/2 cup corn starch

1/2 cup epsom salt

3 Tbsp almond oil or grapeseed oil

1 Tbsp water (add your drops of food coloring to this for even mixing)

Essential Oil as desired (for our quadruple batch I did about four drops each of lemon, tangerine, sweet orange, and bergamot)…Crew could not get enough of smelling them ha!

Our final “ingredient” was a bat-shaped ring (I bought a bag of 30+ at WalMart for a dollar) and they fit perfectly inside the medium sized mold. I thought these would be a fun surprise when the bomb fizzles apart in the tub.

TO MAKE YOUR BATH BOMBS:

After gathering your ingredients, whisk together all the DRY ingredients first. Combine the wet ingredients separately and pour them SLOWLY into the bowl, constantly whisking. The consistency should feel ALMOST as damp as wet sand – a tad more powdery, but still “wet”.

Scoop the mixture into both halves of your mold. Don’t PACK it in, but gently press enough to firm it up, and make sure both halves are overflowing. (At this point, I pressed the bat ring into one side.) Stick your two halves together and press them together, wiping off any excess that comes out the seam. Use your knuckles to tap firmly on either side of the mold so the packed mixture will slide out easily. I used a slight “twist” motion (like unscrewing a cap) to remove one side at a time, and laid them out on a sheet of wax paper to harden up. A lot of recipes called for 24 hours to dry but I think it only helps to give them a solid 48 hours before handling them in any way.

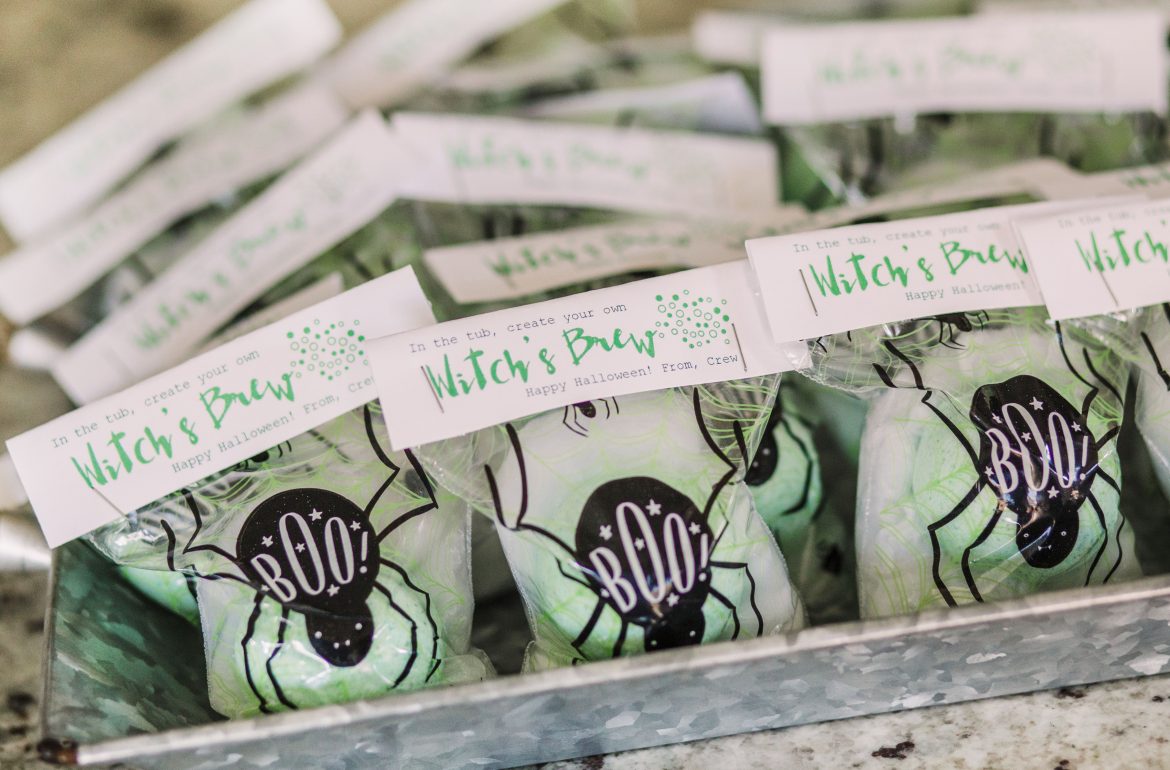
I was nervous about how durable these would be when loaded up dozens deep and handed out at school. My coworker had the genius idea to add some cobweb stuffing to the little ziploc treat bags (found at The Dollar Tree). I added a bomb and some stuffing to each bag, and printed and cut apart the following printable. (They should be about the size of a business card, before folded in half lengthwise). Stick them over the tops of the bags and staple in place. Voila! Witch’s brew for all!

Grab your free printable treat topper by clicking the attachment link below:

Witch’s Brew Printable

Happy Halloween!!

All Crafty

Classroom Valentines: Heart Crayons and 3-D Suckers

I have to say, I’ve loved every stage, but three is proving to be particularly fun with all of its enthusiasm. When I started to explain Valentine’s Day to Crew, and that we were going to make valentines to give his friends, he was ON. BOARD. to say the least.

I started with something he could truly make — you’ve seen these all over Pinterest — heart-shaped crayons. I will say, grouping these into like colors is key…they look like a hot mess if you just mix random hues. Also — tip: Soak the crayons in warm water to make the paper wrappers easier to remove. Once bare, break them into pieces and bake for 15 minutes at 250, popping them out once they’ve cooled. We used this silicone mold and it was the perfect size and super easy to remove the hearts.

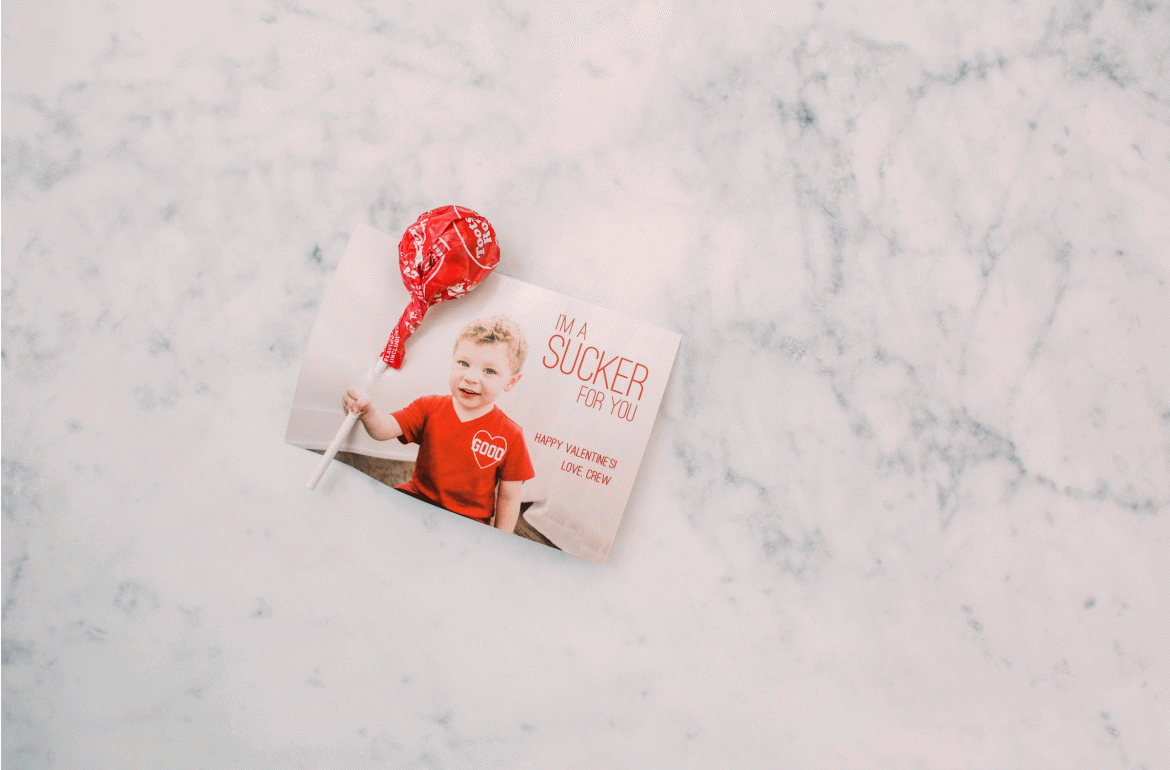
I thought about making the crayons part of his cards, but instead we focused on the holy grail — suckers. Another idea I can’t take credit for, as it already exists around cyberspace: 3D sucker cards. I put Crew in his VDay shirt and among MANY outtakes, (so much “cheeeeese” and eyes closed lately — coupled with holding his arm the right way!) we finally got a shot we could use.

If you attempt this, definitely ask your kiddo to hold his/her arm out in FRONT of them (so the hand is as large as possible to give you space to poke the sucker through) and also out to the SIDE (so the sucker doesn’t end up in front of their face). Don’t shoot too close, allowing plenty of room on the sides to hold both the weight of the sucker and any message you want to add. I laid my text out in photoshop, sampling the red font color from his shirt. I can’t say enough good things about printing with Mpix — I send all my photo clients there! — and when wallets didn’t seem quite big enough to support the suckers, but 4×6 seemed like overkill, I went with 3.5 x 5 prints.

You might say we’re suckers for a good holiday project. 😉


All Crafty

Halloween Classroom Treats

Bugs + Kisses Halloween Treats | www.29thanddelight.com

I’ve always loved Halloween — it’s smack dab in the middle of gorgeous, festive, fall and the costumes, treats, and traditions are all so much fun. It’s a new (less spooky!) kind of fun with a kiddo, and this is the first year that Crew can actually understand reading and talking about trick-or-treating, answer people who ask him what he’s going to be, and (somewhat) understands how far off it is…(“I think Halloween is in two more tomorrows, Mom!”).

Bugs + Kisses Halloween Treats | www.29thanddelight.com

The minute the merchandise hits the stores, I’m all over it. Because we can’t bring homemade treats to school, I kept an eye out for individually wrapped candies, and per Crew’s interest in bugs, found some little spring spiders that you push down to “lock” and then a few moments later they jump a couple feet in the air, to the delight of a certain two-year-old. Sold. I can’t take credit for the “bugs and kisses” — I saw it somewhere on Pinterest at some point and it stuck in my head! The spiders are from Target and I used these treat bags), and whipped up a business card size design to fold in half length-wise and staple across the tops. Quick and cute!